Espresso Puck Prep for Beginners: Distribution, Tamping, and Which Details Matter First
Good puck prep is what makes espresso consistent and forgiving. This beginner guide covers distribution, tamping and dose — the details that matter first — and which advanced tricks you can safely ignore.
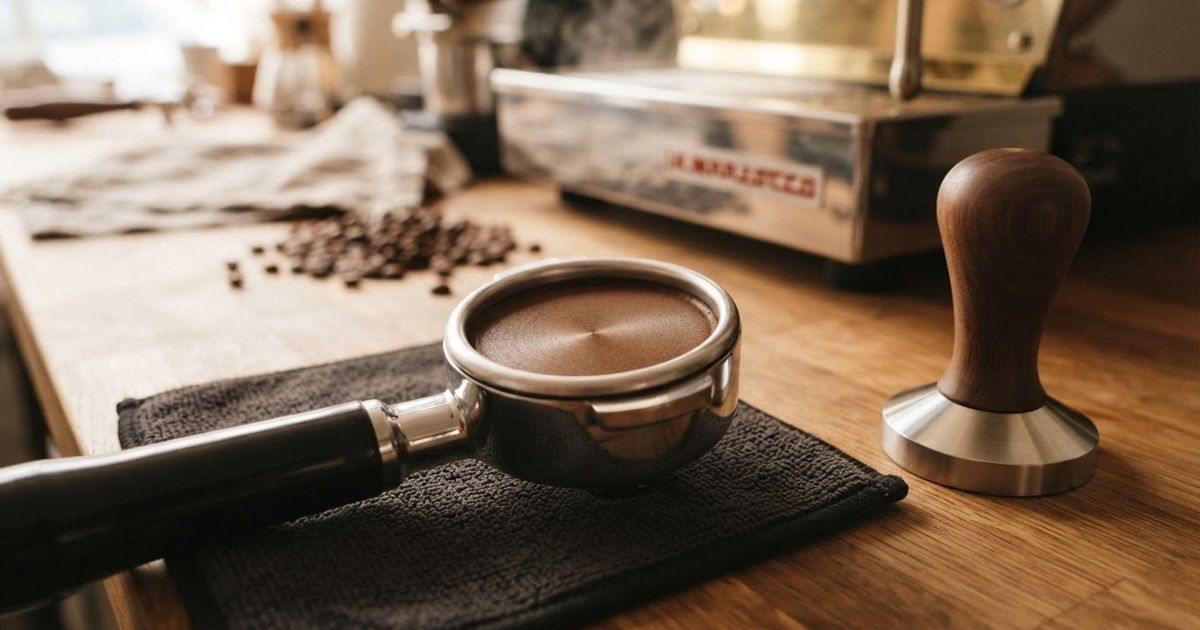
Table of contents
Espresso rewards good habits and punishes sloppy ones faster than any other brew method. A shot forces hot water through a tightly packed bed of coffee under pressure, and water is lazy — it will always seek the easiest path through the grounds. Puck prep is simply the art of making every path equally hard, so the water is forced to extract evenly. Get it right and your shots become consistent and forgiving. Get it wrong and even great beans and a great machine will disappoint. For beginners, the reassuring truth is that a few basics matter far more than the rest.
Why puck prep matters so much
When water finds a weak spot in the coffee bed, it rushes through that channel and barely touches the rest. This is channelling, and it is the root of most bad shots: sour and weak from the under-extracted grounds the water skipped, and harsh from the over-extracted spot it blasted through. The whole point of puck prep is to eliminate those weak spots before the pump ever starts.
If you have not yet met the broader espresso variables — grind, dose, yield and time — our guide on how to dial in espresso is the companion to this one. Puck prep is what makes that dialing-in repeatable, because it removes a hidden variable that otherwise sabotages every adjustment you try.
The details that matter first
There are many puck-prep techniques, and enthusiasts debate the finer ones endlessly. Beginners do not need all of them. Focus on these, in order.
1. Distribution: an even bed before anything else
After you dose your ground coffee into the basket, it lands in an uneven pile — often mounded or leaning to one side. If you tamp that as-is, you press down unevenness and guarantee channelling. Distribution fixes the bed before you compress it.
- Level the grounds so the surface is flat and evenly filled to the edges of the basket, including the corners.
- Break up clumps. Fine grounds clump, and a clump is a dense spot water will avoid. Gently stirring or raking the grounds inside the basket disperses them.
- Simple methods work: a light tap of the portafilter to settle the bed, a gentle side-to-side level with a finger or a distribution tool, or a small stir with a thin implement. You do not need expensive gadgets to get an even bed.
Distribution is the single highest-value habit here. An evenly distributed puck tolerates an imperfect tamp far better than a perfect tamp saves an uneven pile.
2. Tamping: level and consistent, not Herculean
Tamping compresses the leveled grounds into a solid puck. Two things matter, and brute strength is not one of them.
- Level is everything. A tamp that tilts leaves one side denser than the other, and water races through the softer side. Press straight down with the tamper flat against the basket. Check that the puck surface is even and parallel to the basket rim.
- Consistent pressure beats heavy pressure. Once the grounds are compressed into a stable bed, pressing harder does very little — the coffee is already about as dense as it will get. What matters is doing roughly the same thing every time so your shots are comparable. Chasing a specific "correct" force is a distraction for beginners; repeatability is the real goal.
A common beginner worry is tamping "hard enough." Relax about it. A firm, level, repeatable tamp is plenty. Your grind size, not your bicep, controls how much the water resists — which is exactly why grind size is the lever you actually adjust when a shot runs too fast or too slow.
3. Dose and basket fit
The amount of coffee has to suit the basket. Too much and the puck presses against the group head, smearing and disrupting the bed; too little and the puck is loose with too much headroom, so it fractures under pressure. You are aiming for a puck that, once tamped, sits with a small, consistent gap below the shower screen. If your machine came with a basket, start with a dose in its intended range and keep it consistent while you learn.
Details you can safely ignore at first
Espresso culture is full of advanced puck-prep steps. They can help at the margins, but they are not where beginners should spend attention:
- Elaborate multi-tool distribution routines.
- Puck screens and filter papers.
- Precise, gram-perfect tamping targets measured on a scale.
None of these fixes a fundamentally uneven bed or an inconsistent routine. Master the flat, clump-free, evenly tamped puck first; add refinements later only if you can hear a specific problem you are trying to solve.
A repeatable beginner routine
- Dose a consistent amount into a dry basket.
- Distribute — level the bed and break up clumps so it is flat and even to the edges.
- Tamp straight down, level, with firm and repeatable pressure.
- Wipe stray grounds from the rim so the portafilter seats cleanly.
- Lock in and brew, then watch the shot.
Read the shot to check your prep
Your puck prep leaves fingerprints in the shot itself. Watch how the espresso flows:
- Even, steady streams that merge into a smooth, gently darkening pour usually mean a well-prepped puck.
- Squirting jets, sputtering, or one side flowing faster point to channelling — a distribution or tamp-level problem, not necessarily your grind.
- Blonding too fast (the stream turning pale early) alongside a thin taste can mean water found a shortcut.
Learning to read these cues turns every shot into feedback. Pair solid puck prep with a machine you understand — our roundup of beginner espresso machines can help there — and the fundamentals will carry you far further than any single gadget. Even beds, level tamps, consistent habits: that is most of espresso, and it is entirely within a beginner's reach.


